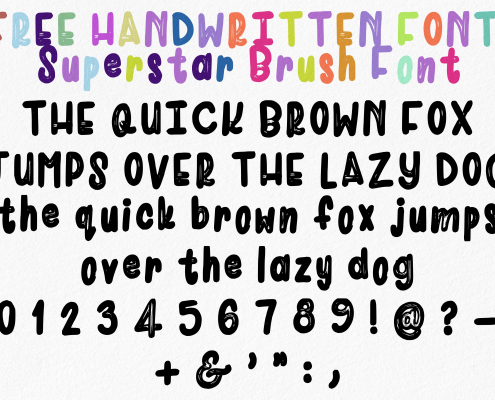
Freebies: Brushes, Fonts and Other Fun Stuff

Download all these amazing VirtuallyCreativ goodies from my shop

❤️ Free brushes

If you love creating digital lettering or digital art on Procreate, this one’s for you! 💕
I’m sharing 3 beautiful handlettering brushes from my VirtuallyCreativ Collection — completely FREE for subscribers!

These brushes are perfect for:

  • ✨ Handlettering & calligraphy
  • 🎨 Digital journaling or planners
  • 💌 Designing stickers or prints
  • 💫 Fun doodles and illustrations

Each brush has been designed with love to help you create expressive, smooth, and magical lettering strokes.

❤️ Free fonts


It’s easy to download:

1. Create an account

2. Add products to your cart

3. Checkout

4. Send your order number to the chat options on the bottom left of the screen should you need to follow up or get in touch

5. Enjoy and share the link with your friends


How to Start a Safe Rolling Fasting Habit

Unlock the power of rolling fasts! Our beginner’s guide shows you a simple, sustainable way to burn fat, boost health, and transform your body without feeling deprived. Learn how to start a safe rolling fasting habit today!


Are you tired of complicated diets that leave you hungry, frustrated, and back at square one? What if there was a flexible, powerful approach to eating that could help you shed stubborn fat, boost your energy, and simplify your life?

Welcome to the world of Rolling Fasts—a sustainable and adaptable fasting method that’s taking the health and wellness community by storm. This isn’t another rigid diet; it’s a lifestyle shift that teaches your body to become a fat-burning machine.


What Exactly is a Rolling Fast?

Unlike traditional intermittent fasting with a fixed schedule (like 16:8 every single day), rolling fasting involves alternating between periods of fasting and eating in a “rolling” pattern, typically over a 48-72 hour cycle.

The most popular and beginner-friendly version is the 36-hour fast. Here’s what a basic cycle looks like:

  • Day 1: Finish dinner by, say, 8:00 PM.

  • Day 2: You fast entirely until…

  • Day 3: …you break your fast at 8:00 AM with breakfast. That’s a 36-hour fast.

Then, you return to a normal eating pattern for one or more days before starting the cycle again. The “rolling” nature means you’re not locked into a daily grind; you choose when to roll your fasts based on your life and how you feel.


Why Rolling Fasts are a Game-Changer for Health & Fat Loss

  1. Maximizes Fat Burning: After about 24 hours of fasting, your body significantly depletes its glycogen (sugar) stores and ramps up fat burning through a process called ketosis. A 36-hour fast gives you a solid 12+ hours in this prime fat-burning state.

  2. Boosts Autophagy: This is your body’s internal “housekeeping” service. Fasting triggers autophagy, where cells clean out damaged components, potentially reducing inflammation and slowing the aging process.

  3. Simplifies Your Life: No more obsessing over multiple meals a day. On fasting days, you free up mental energy and time. On eating days, you can enjoy social meals without guilt.

  4. Improves Insulin Sensitivity: Fasting gives your pancreas a break, helping to lower insulin levels and make your body more responsive to it. This is crucial for fat loss and metabolic health.

  5. It’s Flexible! Got a birthday dinner on Friday? Simply schedule your fast for Wednesday-Thursday. This flexibility makes it incredibly sustainable long-term.

Rolling Fasting Tools by VirtuallyCreativ

Your Safe & Simple 4-Step Guide to Starting Rolling Fasts

Disclaimer: Always consult with your healthcare provider before starting any new dietary regimen, especially if you have underlying health conditions, are pregnant, or have a history of eating disorders.

Step 1: Choose Your Fasting Schedule (Start Gentle!)

Don’t jump straight into a 36-hour fast. Ease your body into it.

  • Beginner Path: Start with a consistent 14:10 or 16:8 intermittent fasting schedule for 1-2 weeks. This gets your body used to fasting.

  • Intermediate Step: Try a single 24-hour fast (e.g., dinner-to-dinner). See how you feel.

  • Rolling Fast Entry Point: Begin with one 36-hour fast per week. For example, fast from Sunday after dinner until Tuesday morning.

Step 2: Prepare for Your Fast (The Key to Success)

What you eat before your fast determines how you feel during it.

  • The Day Before: Focus on a balanced diet with:

    • Quality Protein: Chicken, fish, eggs, tofu.

    • Healthy Fats: Avocado, nuts, olive oil.

    • Complex Carbs & Fiber: Sweet potatoes, quinoa, leafy greens, broccoli.

    • Hydrate: Drink plenty of water and herbal tea.

  • What to Avoid: A meal high in sugar and refined carbs will set you up for hunger crashes and cravings.

Step 3: Navigate Your Fasting Day Like a Pro

  • Hydrate, Hydrate, Hydrate: Water is your best friend. Add a pinch of Himalayan salt to your water to maintain electrolytes.

  • Black Coffee & Herbal Tea: These are allowed and can help suppress appetite. Avoid sugar, milk, or cream.

  • Listen to Your Body: It’s normal to feel hungry in waves. Drink water or tea. If you feel dizzy, weak, or unwell, break your fast. There is no shame in this. Try a shorter fast next time.

  • Stay Busy: Keep your mind occupied with work, hobbies, or a gentle walk. Idle time can lead to obsessive thoughts about food.

Step 4: Break Your Fast Wisely (The Most Important Rule)

Do NOT have a massive feast. Your digestive system has been resting. Shock it with a huge, heavy meal and you’ll feel terrible.

  • The Golden Rule: Start small and gentle.

  • Ideal First Meal: A small, easily digestible meal rich in protein and healthy fats.

    • Examples: A couple of scrambled eggs with avocado, a small salad with grilled chicken, or a bone broth-based soup.

  • Wait 30-60 minutes before having a larger, balanced meal if you’re still hungry.

Sample Rolling Fasting Week

  • Monday: Normal eating (16:8 schedule).

  • Tuesday: Normal eating (16:8 schedule). Finish dinner by 8 PM to start your fast.

  • Wednesday: FASTING DAY. Hydrate with water, black coffee, tea. No calories.

  • Thursday: Break fast at 8 AM with a light meal (e.g., Greek yogurt with berries). Eat normally for the rest of the day.

  • Friday – Sunday: Return to normal, healthy eating patterns.

Who Should Avoid Rolling Fasts?

Rolling fasts are not for everyone. Avoid this approach if you:

  • Are pregnant, breastfeeding, or trying to conceive.

  • Have a history of eating disorders.

  • Are underweight or have nutrient deficiencies.

  • Have diabetes or blood sugar regulation issues.

  • Have chronic stress or adrenal fatigue.

  • Are a child or teenager.

Ready to Roll? Transform Your Health One Fast at a Time

Rolling fasting is a powerful tool, but it’s not magic. Pair it with a whole-foods diet, regular movement, and good sleep for a truly transformative effect. It teaches you the difference between true hunger and habit, empowering you to take control of your health.

Start slow, be consistent, and listen to your body. The simplicity and results might just make you a rolling fast convert for life.

Have you tried rolling fasts? Share your experiences in the comments below!

Using the Rolling 96-Hour Fast Digital Planner: The Guide to Unlock the Benefits of Fasting

If you’re on a journey to improve your health, transform your body, and experience holistic wellness, the Rolling 96-Hour Fast Digital Planner is a game-changing tool you won’t want to miss. This interactive, thoughtfully designed planner isn’t just about organization—it’s a guide that empowers you to optimize your fasting experience while providing the motivation and structure you need to thrive.

In this post, we’ll explore the immense benefits of fasting, particularly focusing on weight loss, dry fasting, and healing. Plus, we’ll share personal user tips for maximizing the planner to transform your fasting journey.

Using the Rolling 96-Hour Fast Digital Planner: Why Choose Rolling 96-Hour Fasting?

Fasting has been a practice rooted in various cultures and traditions, but modern science has now revealed the incredible health benefits it offers. Rolling 96-hour fasting, in particular, is becoming a preferred method among those seeking significant weight loss, cellular healing, and improved metabolic health.

1. Accelerated Weight Loss

One of the primary reasons people embark on fasting journeys is for weight loss. Here’s why the 96-hour fasting method is so effective:

  • Fat Burning Mode: When you fast for extended periods, your body depletes its glycogen stores and begins to burn fat for fuel. This process, called lipolysis, leads to rapid and effective weight loss.
  • Reduced Caloric Intake: Fasting reduces your overall caloric intake over time, helping to create a sustainable calorie deficit. Even during your eating windows, you’re less likely to overconsume.
  • Boosted Metabolism: Contrary to popular belief, fasting doesn’t necessarily slow down your metabolism. In fact, short-term fasting has been shown to boost metabolic rate by 3.6-14% over the initial days.

2. Benefits of Dry Fasting

Dry fasting, a type of fasting where you abstain from both food and water, can be even more powerful for some when done correctly and safely. Here’s what makes it unique:

  • Cellular Autophagy: Dry fasting accelerates the body’s natural process of autophagy, where damaged cells are broken down and eliminated. This promotes cellular repair and can help rejuvenate your body at a deep level.
  • Healing Inflammation: The absence of water intake triggers the body to seek out intracellular water, often found in inflamed tissues. This helps reduce chronic inflammation and supports healing.
  • Enhanced Fat Burning: Dry fasting further pushes your body to burn fat for energy, which can amplify weight loss. This is because fat breakdown releases metabolic water, which the body uses during a dry fast.


Using the Rolling 96-Hour Fast Digital Planner: Healing and Regeneration through Fasting

Beyond weight loss, fasting offers profound healing benefits:

  1. Detoxification: During a fast, your body switches from digestion mode to detox mode. The liver and kidneys work more efficiently to flush out toxins, giving your organs a much-needed rest and rejuvenation.
  2. Improved Insulin Sensitivity: Fasting lowers blood sugar levels and improves insulin sensitivity, reducing the risk of developing type 2 diabetes. It also helps reset your metabolism, making your body more efficient in processing nutrients.
  3. Gut Health Reset: Extended fasting can give your gut a chance to heal. It allows the gut lining to regenerate and balances the microbiome, reducing bloating and digestive discomfort.
  4. Hormonal Balance: Hormones like leptin and ghrelin, which regulate hunger, are optimized during fasting. Women, in particular, can experience hormonal balance, though it’s essential to listen to your body and adjust as needed.


Using the Rolling 96-Hour Fast Digital Planner: How the Rolling 96-Hour Fast Digital Planner Can Transform Your Journey

Our planner isn’t just a simple tracker. It’s an all-in-one interactive guide to support your entire fasting process. Here’s a detailed look at the benefits:

  1. Structured Tracking: The planner offers hyperlinked sections to track every fasting period with ease. You can monitor weight changes, moods, energy levels, and meal plans, making it simple to stay on top of your progress.
  2. Goal Setting and Reflection: At the start of each week, you can set specific goals, and at the end, reflect on what worked and what can be improved. This self-assessment is crucial for long-term success.
  3. Meal Planning and Feast Tracking: It’s not just about fasting; your refeeding phase is equally important. Use the planner to create balanced meal plans for your feast days and track how your body responds.


Using the Rolling 96-Hour Fast Digital Planner: Personal Tips for Using the Rolling 96-Hour Fast Digital Planner

From real user experience, here are some helpful strategies for getting the most out of your planner:

1. Navigate from the Index Page and Fill in Your Starting Data

The planner’s index page is your command center. Start by entering your initial weight, measurements, and goals. This creates a baseline for you to track your progress and stay motivated.

2. Set Up for Each Fast by Using the Duplicate Pages Feature

  • From the index, choose the pages you want to duplicate. For example, the Custom Page is perfect for creating a vision board. Add photos of your dream body, inspirational quotes, or images of the meals you’ll enjoy post-fast.
  • Use this page to map out your intentions for each fast and get excited about your journey.

3. Add the Weekly Planner Page for Goals and Focus

  • Insert the Weekly Planner Page to set goals, track your to-do list, and write down notes or affirmations. Having a weekly focus can keep you grounded and intentional.

4. Plan Your Feast with the Meal Planner

  • On the last day of your fast, use the Meal Planner Page to create a balanced menu. Think of nourishing, high-quality foods that will make your body thrive. This prevents impulsive eating and ensures you’re fueling your body with the right nutrients.

5. Use the Weekly Review Page for Reflection

  • After your feast day, reflect on the week: What did you learn? How did you feel physically and mentally? What could you do better next time? This helps you make continuous improvements.

6. My Fasting Week Setup

For optimal structure and motivation, try this setup:

  1. Custom Page: Vision board, inspiration, or motivational content
  2. Weekly Planner Page: Goals, affirmations, to-dos
  3. Fasting Journal Page: Track mood, weight, and observations
  4. Meal Planner Page: Plan your refeed meals
  5. Feast Day Page: Journal how you feel after eating
  6. Weekly Review Page: Reflect on the week and plan ahead

Note: While the planner’s navigation is simple, this setup allows for extra customization and inspiration. Remember, there are 53 weeks of tracking pages—use them to stay motivated!

Dry Fasting Safety Tips

While the benefits of dry fasting are powerful, safety is paramount. Here are a few tips to keep in mind:

  1. Stay Informed: Research thoroughly before attempting dry fasting. Speak to a healthcare professional if you have any health conditions.
  2. Start Slow: If you’re new to dry fasting, consider easing into it by starting with shorter periods and gradually increasing the duration.
  3. Listen to Your Body: Always pay attention to how you feel. If you experience severe discomfort or dizziness, it’s time to rehydrate and break your fast.
  4. Refeed Mindfully: After a dry fast, rehydrate slowly and avoid heavy, greasy meals. Start with small sips of water, followed by nutrient-rich, easy-to-digest foods.

User Experiences and Success Stories

Our community has seen incredible results using the Rolling 96-Hour Fast Digital Planner. Here are just a few highlights:

  1. “Lost 12 lbs in 3 Weeks!”: One user shared, “I can’t believe how organized I’ve become! Tracking my progress keeps me motivated, and I’ve already lost 12 lbs in 3 weeks. The custom pages are my favorite for creating vision boards!”
  2. “Healing My Body”: Another faster wrote, “I started dry fasting to reduce inflammation, and this planner has been a lifesaver. The weekly review section helps me reflect and make adjustments. I feel more in tune with my body than ever.”
  3. “Staying on Track”: “The meal planning pages have transformed my feasting days. I no longer binge after fasting because I have a plan. Highly recommend it!”
  4. Loose skin” – a lot of users have not experienced any loose skin with dry fasting, in fact, dry fasting is used to reduce the look of loose skin.
  5. No supplements or gimmicks” – allowing your body to heal naturally without flooding your system with drugs such as fat burners, diuretics like duromines or silly nonsensical and disgusting recipes involving lemon juice apple cider vinegar or lemon coffee!.
  6. This digital planner is not only a guide but your actual map and coach. All you have to do is to follow the plan and trust the process to reach your weight loss goals!


Using the Rolling 96-Hour Fast Digital Planner: Join the Community

We’re excited to announce an upcoming community group chat (on WhatsApp) for rolling 96-hour fasters! This exclusive group will provide a space to share experiences, offer support, and connect with others on the same journey. Stay tuned and get your planner to be a part of this empowering community. You can indicate if you wish to not be added to the group when you’re buying this planner but we’d love to have you!

Using the Rolling 96-Hour Fast Digital Planner: Conclusion

The Rolling 96-Hour Fast Digital Planner is more than just a tool—it’s a companion on your path to better health, weight loss, and healing. By staying organized, setting clear goals, and reflecting regularly, you can achieve incredible results and transform your wellness journey.

Good luck to everyone currently on their journey! Ready to get started? Visit our shop and grab your planner today, join the group chat and Your body—and your future self—will thank you! Tag us on Instagram, Threads, Facebook, TikTok, Youtube or any social platform you’re sharing your journey on – we’d love to cheer you on!

The Frog King – My Creative Process Using Oil Pastels in Procreate

The Story Behind “The Frog King”

Every artwork I create tells a story — and The Frog King is no different. This piece was born out of a fascination with fairytales and transformation, but with a twist of personality and color. I wanted to bring a sense of playfulness and charm to the canvas while exploring texture and depth using oil pastels in Procreate.

The idea started when I stumbled across a photo reference that caught my attention — a quirky, expressive frog that seemed to have a secret to tell. From there, I knew exactly what I wanted to create: a character that felt both royal and mischievous, glowing with confidence and charm.


Step 1: Finding the Perfect Reference Image

Before any brushstroke or pastel texture, I always start with finding the right reference image. I look for something that sparks emotion or tells a silent story. For The Frog King, it was all about expression — the tilt of the head, the glint in the eye, and the texture of the skin that would make the artwork come alive.

References help ground my imagination. They give me a solid base to work from, while still leaving room for creativity and improvisation as I sketch and paint.


Step 2: Rough Sketching the Outline

Once I’ve got the reference ready, I begin with a rough sketch. This is one of my favorite parts of the process because it’s where I get to loosen up and let the creative flow take over. I sketch lightly and freely, mapping out shapes, proportions, and the overall structure of the character.

At this stage, perfection doesn’t matter — it’s all about capturing the feeling and movement of the piece. I like to think of it as a conversation between my imagination and the canvas.

Step 3: Painting with Oil Pastels in Procreate

Then comes the fun part — painting! For The Frog King, I used oil pastels for Procreate to color, shade, and bring texture to life. Oil pastels are one of my favorite tools because they blend beautifully and add that soft, organic feel that mimics traditional media.

Layer by layer, I build up the colors — from vibrant greens and yellows to subtle hints of shadow and light. I use different brush sizes and blending techniques to give the artwork that realistic, yet whimsical finish.

To enhance depth, I added a few texture brushes that helped create lighting effects and atmosphere, making the frog’s crown glimmer and the eyes sparkle just right.


Step 4: Adding Texture and Lighting for Depth

Depth is everything in digital painting. I often spend extra time experimenting with light sources and texture overlays to make sure the subject feels three-dimensional and alive. In The Frog King, I played with contrast — soft highlights against rich, dark tones — to guide the viewer’s eye directly to the frog’s regal face.

Lighting can transform a flat sketch into something magical, and that’s what I aimed for here: a fairytale glow that draws you in.


Step 5: Final Touches and Reflections

Once the painting felt balanced, I added my final details — subtle highlights, a few sparkles, and some color correction to make everything pop. I love this stage because it’s when the artwork truly comes to life.

Looking back at The Frog King, I see a mix of curiosity, humor, and creativity — all the things that make digital art so fulfilling to me.


What I Learned from This Piece

Every artwork teaches me something new. The Frog King reminded me to trust my instincts and let the process unfold naturally. Not every line needs to be perfect, and not every detail has to be polished — sometimes the charm lies in the imperfections that make a piece feel real.


Join Me on My Art Journey

If you enjoyed learning about my process, I’d love for you to follow along on my creative adventures! I share behind-the-scenes looks at my art, brush reviews, and Procreate tips regularly.

💕Support me on social media (links are on every page of this website)

🎨 Explore more artworks: Virtually Creativ Art Portfolio


Art is not just about the final piece — it’s about every sketch, every color test, and every quiet moment spent creating. The Frog King is a reminder that creativity grows when we allow ourselves to play, experiment, and express freely.


Welcome to My Creative Space: Art, Procreate Brushes & Painting Adventures

Welcome to My Creative Space ✨

Hello and welcome to sisandamofokeng.co.za — my little corner of the internet where art, creativity, and digital tools come together. I’m so glad you found your way here!

This website is both a portfolio of my painting adventures and a growing shop filled with Procreate brushes, stamps, and other digital tools I’ve lovingly crafted to inspire your own creative journey.

Whether you’re a fellow digital artist, a curious beginner, or just here to enjoy some colorful art, you’ll find a mix of:

  • Painting Adventures – I’ll be sharing the behind-the-scenes of my creative process, experiments, and the fun (and sometimes messy!) journey of making art.
  • Brush & Stamp Reviews – From custom brushes I’ve designed to standard Procreate tools, I’ll be reviewing and showcasing how I use them in my work. You’ll get honest insights, tips, and recommendations you can use in your own projects.
  • Custom Creations – I love designing brushes and stamps that make art playful and exciting. You’ll get to see them in action and, if they inspire you, you can grab them in my shop to use in your own art.
  • Techniques & Tutorials – Expect practical tips, techniques, and step-by-step guides showing you how I paint, layer, and bring my ideas to life.
  • Portfolio & Inspiration – Beyond brushes, this site is also a growing showcase of my artwork — a gallery where I pour my heart, colors, and imagination.

And because I believe art should be fun and accessible, I also share free brushes from time to time! Make sure to register an account so you don’t miss out on these exclusive downloads, special offers, and creative resources.

Welcome to My Creative Space: Why I Started This Site

Art has always been more than just images on a canvas for me — it’s a way to tell stories, to experiment, and to connect with others who love creating. Procreate became my favorite tool because it opened up a whole new world of possibilities, and creating brushes turned into an obsession (the good kind!).

Now, I want to share that joy with you — through my art, my tools, and this blog.


Welcome to My Creative Space: Join Me on This Journey

Here’s how you can be part of this space:

  • Browse the Shop and discover unique brushes and stamps to level up your Procreate art.

  • Register for Free Brushes and get special creative goodies just for being part of my community.

  • Explore My Art for inspiration and maybe even spark ideas for your own creative projects.

  • Stay Connected — keep an eye out for updates, tutorials, and new releases as I grow this space.

Thank you for stopping by — I can’t wait to share this creative adventure with you. Welcome to the world of VirtuallyCreativ  Art.

Procreate Chapter 2: Layers, Brushes & Color Magic

Procreate Chapter 2 explores three core areas in Procreate: layers, brushes, and color tools. These features form the foundation of any digital artwork, and mastering them will take your creative skills to the next level.

Lesson 2.1: Mastering Layers

What are Layers?
Layers are like transparent sheets stacked on top of each other. You can draw on each sheet independently, which makes editing, arranging, and adding depth to your artwork easy.

Step-by-Step Tutorial: Chapter 2

  1. Open Layers Panel

    • Tap the Layers Icon (looks like two stacked squares in the top-right toolbar).

  2. Add a New Layer

    • Tap the + icon at the top of the layer list.

  3. Rename a Layer

    • Tap the layer name and select “Rename.”

  4. Duplicate or Delete a Layer

    • Swipe left on the layer: choose Duplicate or Delete.

  5. Select Multiple Layers

    • Swipe right on each layer you want to select.

  6. Reorder Layers

    • Tap and hold a layer, then drag it up or down.

  7. Use Alpha Lock

    • Swipe right with two fingers on a layer (or tap and choose Alpha Lock).

    • This locks transparency so you can only draw on existing pixels.

  8. Use Clipping Masks

    • Create a new layer above your base layer.

    • Tap the new layer and select Clipping Mask.

    • Now your strokes will only appear within the base layer’s painted area.


Lesson 2.2: Exploring Procreate Brushes

Procreate’s brush engine is incredibly powerful and customizable. Brushes are grouped into categories like Sketching, Inking, Painting, Textures, etc.

Step-by-Step Tutorial:

  1. Open the Brush Library

    • Tap the paintbrush icon on the top right.

  2. Explore Brush Sets

    • Tap any category (e.g., Inking, Airbrushing) to explore included brushes.

  3. Try a Brush

    • Select a brush and test it on the canvas.

  4. Adjust Brush Settings

    • Tap the selected brush again to enter Brush Studio.

    • Modify settings like:

      • Stroke Path: spacing, jitter, etc.

      • Taper: changes stroke pressure ends.

      • Shape & Grain: texture of your brush.

      • Dynamics: tilt and pressure sensitivity.

  5. Duplicate a Brush Before Editing

    • Always duplicate a brush (swipe left > Duplicate) before making major changes.

✨ Brush Suggestions: Chapter 2

  • Monoline: Perfect for clean lines and lettering.

  • Soft Brush (Airbrushing): Great for shading and blending.

  • Technical Pen: Crisp for outlines and cartoon styles.


Lesson 2.3: Color Tools & Harmony

The Color Panel in Procreate gives you rich tools for picking, saving, and managing color.

Step-by-Step Tutorial: Chapter 2

  1. Open Color Panel

    • Tap the small Color Dot in the top-right corner.

  2. Choose Your View

    • Choose between:

      • Disc: Color wheel.

      • Classic: Sliders and spectrum.

      • Harmony: Shows color relationships (e.g., complementary).

      • Value: Enter color codes manually (RGB, Hex).

      • Palettes: Save and organize your color schemes.

  3. Use the Eyedropper Tool

    • Tap and hold on the canvas to activate the Eyedropper, which lets you pick any color.

  4. Create and Save Color Palettes

    • In the Palettes tab, tap + to make a new palette.

    • Tap a square to add a new color.

  5. Try Harmony Mode

    • In the Harmony tab, use options like Complementary, Analogous, Triadic to create balanced color combos.

✨ Color Tips: Chapter 2

  • Stick to 3–5 core colors to create visual consistency.

  • Warm tones (red, orange, yellow) come forward; cool tones (blue, green) recede.

  • Use neutral tones (beige, grey) to balance vibrant accents.

Lesson 2.4: Blending and Smudging

Procreate lets you blend and smudge like traditional art, creating smooth gradients and natural transitions.

Step-by-Step Tutorial:

  1. Open Smudge Tool

    • Tap the pointed finger icon in the top toolbar.

  2. Choose a Soft Brush

    • Select brushes like Soft Brush, Airbrush, or any custom soft tool.

  3. Blend Gently

    • Lightly smudge between two colors for a seamless blend.

    • Change brush size and opacity for subtle effects.

  4. Try Different Brushes

    • Smudging results change drastically depending on the brush used.

Bonus: Blending Modes (Advanced Tip)

  1. Tap the ‘N’ on the right side of a layer.

  2. Choose a blend mode like:

    • Multiply: Darkens based on layer below.

    • Overlay: Boosts contrast.

    • Add: Lightens and brightens.

Use blending modes to enhance lighting, depth, and atmosphere.

✅ Chapter 2 Checklist

  • I can use layers and organize my canvas.

  • I’ve tried multiple default brushes.

  • I understand how to adjust brush settings.

  • I know how to create color palettes and use the Harmony tool.

  • I’ve practiced blending and using the Smudge tool.

  • I experimented with Alpha Lock and Clipping Mask.

Download some of our single brushes, which cost less than brushsets, and practice. The Procreate default brushes are perfectly capable of giving you all the benefits and experience of digital art, too! Remember to tag us on social media – we’re excited to cheer you on!


Procreate Chapter 1: How to Best Get Started with Procreate

Mastering Procreate: A Step-by-Step Learning Plan for Beginners. In this chapter, you’ll learn how to navigate the Procreate interface, use essential gestures, set up your first canvas, and complete your basic drawing. This chapter lays the foundation for everything else. If you’re a beginner like all of us are at some point, then Chapter 1 will get you familiar with Procreate! If you’re a visual learner and prefer to start with watching the process in action, there are endless video tutorials on the internet.

Lesson 1.1: Understanding the Procreate Interface

Step-by-Step Breakdown

1. Open Procreate

  • Tap the Procreate app on your iPad.

  • You’ll land in the Gallery View, which shows all your artworks.

2. Exploring the Gallery View

  • Tap “Select” to organize or delete artworks.

  • Tap the stack icon to group drawings.

  • Tap on an artwork to enter canvas mode.

3. Create a New Canvas

  • Tap the + icon (top-right).

  • Choose a default canvas (ex: Screen Size) or tap “Create Custom Size”.

4. Create Custom Canvas

  • Recommended beginner settings:

    • Width: 3000 px

    • Height: 3000 px

    • DPI: 300

    • Color Profile: RGB (P3 for rich colors)

5. Canvas Interface Layout

  • Top Toolbar (left to right):

    • Actions (wrench icon)

    • Adjustments (magic wand)

    • Selections (ribbon icon)

    • Move tool (arrow)

  • Sidebar (left side):

    • Brush Size (slider)

    • Brush Opacity (slider)

    • Color (circle at the bottom)

  • Right Tools:

    • Brush (paintbrush)

    • Smudge (finger)

    • Eraser (eraser)

    • Layers (two squares)

    • Color (circle)

Try my Procreate Brushes

Chapter 1: Practice Exercise

  1. Open a new canvas.

  2. Tap every icon and explore.

  3. Try changing brush size and opacity.

  4. Use Undo (two-finger tap) and Redo (three-finger tap).

Lesson 1.2: Essential Gestures & Shortcuts

Important Procreate Gestures


Gesture Action
Two-finger tap Undo
Three-finger tap Redo
Pinch in/out Zoom in/out
Rotate with two fingers Rotate canvas
Four-finger tap Fullscreen mode
QuickShape (hold pen) Creates perfect shapes/lines
Tap and hold color dot Color picker
Three-finger swipe down Cut/copy/paste menu
Drag color to area Fill with selected color

Chapter 1: Quick Tips

  • Tap and hold the square (left sidebar) to activate Precision Mode.

  • Use QuickShape by drawing a shape and holding your pen in place.

Chapter 1: Practice Exercise

  1. Draw a circle. Hold for QuickShape.

  2. Fill it with color by dragging the color dot into it.

  3. Undo and Redo the action.

Lesson 1.3: Setting Up Your Canvas Correctly

Canvas Types Based on Usage

For Social Media Art

  • Size: 2048 x 2048 px or 1080 x 1350 px

  • DPI: 150

  • Color Profile: RGB

For Print Projects

  • Size: A4 or A3 (in inches or mm)

  • DPI: 300

  • Color Profile: CMYK or RGB

For Animation

  • Size: 1920 x 1080 px

  • DPI: 72–150

  • Color Profile: RGB

Understanding Color Profiles

  • RGB (Red, Green, Blue) – Best for screen work. Bright, vivid colors.

  • CMYK (Cyan, Magenta, Yellow, Black) – Used for print, but colors look duller.

Practice Activity

  1. Create 2 canvases:

    • RGB at 150 DPI

    • CMYK at 300 DPI

  2. Try painting with the same color on both.

  3. Observe the color differences.

Lesson 1.4: Your First Drawing Challenge

Tools to Use

  • Sketching Pencil Brush (in Sketching category)

  • Monoline Brush (for bold outlines)

  • Color Wheel (to select shades)

Chapter 1: Challenge Steps

  1. Open a blank canvas.

  2. Use the pencil brush to draw a simple face or flower.

  3. Create a new layer and trace over it with the Monoline brush.

  4. Add a third layer and apply basic colors.

  5. Experiment with the opacity slider to shade your drawing.


End-of-Chapter Checklist

✅ I can create a canvas and choose the right settings
✅ I know how to navigate the Procreate interface
✅ I can use gestures like Undo, Redo, and QuickShape
✅ I understand the difference between RGB and CMYK
✅ I’ve made my first Procreate drawing

Download some of our single brushes, which cost less than brushsets, and practice. The Procreate default brushes are perfectly capable of giving you all the benefits and experience of digital art, too! Remember to tag us on social media – we’re excited to cheer you on!

Related: Mastering Procreate: A Step-by-Step Learning Plan for Beginners

96-Hour Reboot Rolling Dry Fast | Exclusive Cycle 0

96-Hour Reboot – Introduction: Why I Needed a Reboot

As someone who has struggled with sugar addiction and emotional eating, I knew I needed a drastic reboot. My weight had climbed to 300lbs, and my energy levels were at an all-time low. I was constantly fatigued, dealing with cravings, and stuck in a cycle of unhealthy eating habits.

That’s when I decided to reboot my system—eliminating trigger foods, adopting a strict carnivore diet, and implementing rolling 40-hour dry fasts to jumpstart fat loss and mental clarity.

In this post, I’ll share:
✅ How I structured my elimination week
✅ My fasting and diet protocol
✅ The tools I use to track progress
✅ My weekly schedule for sustainable fat loss
✅ Important safety notes for dry fasting

If you’re looking for a structured, no-nonsense approach to breaking food addiction and losing weight, this plan might work for you too.

96-Hour Reboot

Step 1: Elimination Week – Cutting Out Trigger Foods

Before diving into fasting, I needed to detox from sugar and processed carbs. My biggest weaknesses were:

  • Chocolate
  • Table sugar
  • Bread
  • Fries

I went cold turkey and switched to high-protein, zero-carb carnivore eating for several days. As a sugar addict, I’ve learned that total elimination is the only way for me—no “cheat days,” no compromises.


My Modified Carnivore Coffee Hack

I wasn’t ready to give up coffee, so I made it work for my diet:

  • Heavy cream + whipped milk instead of sugar
  • Rich, and satisfying flavor without the blood sugar crash

This small change helped me avoid sugary coffee, which has always been an issue for me.

Step 2: Tracking Progress – Starting Stats (April 14, 2025)

Metric Measurement
Highest Weight 300.0 lbs
Current Weight 295.0lbs
Body Fat % 45.1%
Water % 40.3%
Muscle Mass 28.2%
Waist 46.5″
Hips 56.5″
Total Lost (-5.0lbs)

(I’ll update these at the end of each cycle to track changes.)

Step 3: Tools for My Reboot & Long-Term Success

To stay disciplined, I use a combination of tracking tools and challenges:

Progress Tracking

️ Exercise Plan

  • 30-Day Yoga Challenge (starting May 1st, 2025)
  • Jump Rope 1000x (once I hit 200lbs or below)

⚡ Fasting Protocol

  • Type: Dry fasting (no food or water)
  • Schedule: Rolling 40-hour fasts (to start and gradually increase to 96 hours or beyond) → 8-hour refeed windows (with 2 meals)

Step 4: My 40-Hour Dry Fasting Plan (Carnivore Reboot)

Start Date: April 9, 2025
Starting Weight: 300 lbs
Goal Weight: 125 lbs

Weekly Schedule (Repeating Cycle)

  1. Fast for 40 hours (dry fast – no water)
  2. Refeed for 8 hours (2 carnivore meals)
  3. Repeat immediately
  • Electrolytes: Pink salt + magnesium supplements

Exercise During Fasts

  • 30-minute daily yoga (even while fasting)


⚠️ Critical Notes for Safety & Adaptation

1. Metabolic Adaptation

  • After 200lbs, weight loss may slow to ~2.5lbs/day (adjust expectations).

2. Refeed Control

  • Weigh food to avoid overeating.
  • Strict portions minimize weight regain.

3. Transition Warning

  • The first 2 cycles may be challenging as the body adapts.

4. Safety First

  • STOP immediately if you experience:
    • Dizziness
    • Extreme weakness
    • Heart palpitations

96-Hour Reboot Final Thoughts: My Mindset Going Forward

This isn’t just a diet—it’s a complete metabolic reset. By combining:
✔ Dry fasting
✔ Clean eating
✔ Structured exercise (when I do commit to it)

I’m giving my body the best chance to heal, burn fat, and break my food addiction.

Next Steps:

  • Cycle 1 begins April 14, 2025

I’ll be documenting my journey, so follow along if you’re curious about the results!

Your Turn – Have You Tried Dry Fasting?

Let me know in the comments:

  • What’s your biggest struggle with weight loss?
  • Have you experimented with fasting or diet of choice?
  • Want to try using my fasting tools? Check out the shop and use the discount codes at checkout

Mastering Procreate: A Step-by-Step Learning Plan for Beginners

Welcome to the Mastering Procreate course! This structured course plan will guide you from the basics to advanced skills, covering everything from creating your canvas to creating custom brushes. Each course chapter includes step-by-step lessons, exercises, and projects to reinforce learning. In this post, we will provide an overview of each chapter (with its lessons) and then attempt to tackle each chapter in detail in the upcoming posts – subscribe to the blog to avoid missing out! Each chapter will be followed by an exercise/challenge; enjoy!

Chapter 1: Mastering Procreate

Lesson 1: Introduction to Procreate

  • Overview of Procreate’s interface

  • Understanding the gallery, canvas, and toolbar

  • Essential tools: Brushes, Smudge, Eraser, Layers

Lesson 2: Setting Up Your Canvas

  • Choosing the right canvas size and resolution

  • Understanding DPI and color modes

  • Navigating the canvas: zooming, rotating, and panning

Lesson 3: Essential Gestures & Shortcuts

  • Using finger gestures for quick actions

  • Customizing Procreate settings for efficiency

  • Quick actions: undo, redo, quick menu

Exercise: Create a new canvas and practice using gestures to navigate and manipulate it.

Chapter 2: Mastering Procreate – Brushes & Basic Strokes

Lesson 4: Introduction to Brushes

  • Brush Library overview

  • Brush settings: opacity, size, pressure sensitivity

  • Practicing smooth lines and strokes

Lesson 5: Exploring Brush Types

  • Pencil, ink, paint, and texture brushes

  • Layering strokes for depth

  • Adjusting brush flow and opacity

Exercise: Experiment with different brushes to create a simple sketch.

Chapter 3: Mastering Procreate – Layers & Selections

Lesson 6: Understanding Layers

  • How layers work and why they’re important

  • Using blending modes and opacity

  • Merging, grouping, and organizing layers

Lesson 7: Selections and Transformations

  • Lasso tool and automatic selection

  • Transforming, scaling, and warping objects

  • Clipping masks and alpha lock

Project: Draw a simple object using multiple layers and apply a blending mode.

Chapter 4: Mastering Procreate – Colors, Blending & Shading

Lesson 8: Color Theory & Palettes

  • Understanding RGB vs. CMYK

  • Creating custom color palettes

  • Using the color wheel and harmony tools

Lesson 9: Blending Techniques & Shading

  • Soft and hard shading methods

  • Smudge tool vs. blending with brushes

  • Layering colors for gradients and depth

Project: Create a shaded sphere using different blending techniques.

Chapter 5: Mastering Procreate – Sketching & Line Art

Lesson 10: Sketching Fundamentals

  • Basic shapes and forms

  • Gesture drawing and loose sketching

  • Refining a rough sketch

Lesson 11: Clean Line Art Techniques

  • Choosing the right brush for line art

  • Line weight and pressure sensitivity

  • Using stabilization for smooth lines

Project: Sketch a simple character and refine it with clean line art.

Chapter 6: Adding Details & Textures

Lesson 12: Using Textures in Art

  • Applying texture brushes

  • Creating depth with texture overlays

  • Blending textures naturally

Lesson 13: Adding Highlights & Shadows

  • Understanding light sources

  • Creating realistic highlights and shadows

  • Using layer modes for lighting effects

Project: Draw an object and apply textures, highlights, and shadows.

Chapter 7: Digital Painting & Rendering

Lesson 14: Basic Digital Painting Techniques

  • Blocking in colors

  • Layering and refining shapes

  • Soft vs. hard edges

Lesson 15: Advanced Rendering & Detailing

  • Painting skin, hair, and fabric

  • Creating a painterly effect

  • Finalizing artwork with subtle adjustments

Project: Paint a simple portrait or still life scene.

Chapter 8: Creating Custom Brushes

Lesson 16: Understanding Brush Studio

  • Exploring brush settings and customization

  • Adjusting brush shape and grain

  • Creating a basic custom brush

Lesson 17: Advanced Brush Making

  • Adding textures to brushes

  • Adjusting pressure and tilt settings

  • Creating dynamic brushes for specific effects

Project: Design and save three custom brushes for different purposes.

Chapter 9: Special Effects & Advanced Techniques

Lesson 18: Using Clipping Masks & Alpha Lock

  • Non-destructive editing techniques

  • Layering effects for depth

  • Applying patterns and textures

Lesson 19: Glow, Neon, & Lighting Effects

  • Using Gaussian Blur and motion blur

  • Creating neon effects

  • Adding glow and reflections

Project: Design a glowing neon sign using lighting effects.

Chapter 10: Composition & Finalizing Art

Lesson 20: Composition & Layout

  • Rule of thirds and focal points

  • Balancing elements in an artwork

  • Using grids and guides

Lesson 21: Exporting & File Management

  • Saving files in different formats (PNG, JPEG, PSD)

  • Exporting time-lapse videos

  • Backing up and organizing Procreate files

Final Project: Create a finished illustration using everything learned in the course.

Bonus Chapter: Procreate for Lettering & Calligraphy

Lesson 22: Introduction to Digital Lettering

  • Choosing the right brushes

  • Basic strokes and letter formations

  • Creating stylish hand-lettering

Lesson 23: Enhancing Lettering with Effects

  • Using shadows and highlights

  • Adding textures and embellishments

  • Creating 3D lettering effects

Project: Design a custom lettered quote with decorative elements.

Next Steps

This plan will take you from a beginner to a confident digital artist! Each chapter is structured to help you build skills progressively, with exercises and projects reinforcing your learning. Would you like me to format it into a printable PDF or add more interactive elements?