Procreate Chapter 2 explores three core areas in Procreate: layers, brushes, and color tools. These features form the foundation of any digital artwork, and mastering them will take your creative skills to the next level.
Lesson 2.1: Mastering Layers
What are Layers?
Layers are like transparent sheets stacked on top of each other. You can draw on each sheet independently, which makes editing, arranging, and adding depth to your artwork easy.
✅ Step-by-Step Tutorial: Chapter 2
-
Open Layers Panel
-
Add a New Layer
-
Rename a Layer
-
Duplicate or Delete a Layer
-
Select Multiple Layers
-
Reorder Layers
-
Use Alpha Lock
-
Use Clipping Masks
-
Create a new layer above your base layer.
-
Tap the new layer and select Clipping Mask.
-
Now your strokes will only appear within the base layer’s painted area.
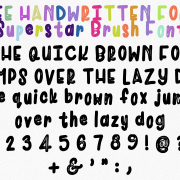
️ Lesson 2.2: Exploring Procreate Brushes
Procreate’s brush engine is incredibly powerful and customizable. Brushes are grouped into categories like Sketching, Inking, Painting, Textures, etc.
✅ Step-by-Step Tutorial:
-
Open the Brush Library
-
Explore Brush Sets
-
Try a Brush
-
Adjust Brush Settings
-
Duplicate a Brush Before Editing
✨ Brush Suggestions: Chapter 2
-
Monoline: Perfect for clean lines and lettering.
-
Soft Brush (Airbrushing): Great for shading and blending.
-
Technical Pen: Crisp for outlines and cartoon styles.
Lesson 2.3: Color Tools & Harmony
The Color Panel in Procreate gives you rich tools for picking, saving, and managing color.
✅ Step-by-Step Tutorial: Chapter 2
-
Open Color Panel
-
Choose Your View
-
Choose between:
-
Disc: Color wheel.
-
Classic: Sliders and spectrum.
-
Harmony: Shows color relationships (e.g., complementary).
-
Value: Enter color codes manually (RGB, Hex).
-
Palettes: Save and organize your color schemes.
-
Use the Eyedropper Tool
-
Create and Save Color Palettes
-
Try Harmony Mode
-
In the Harmony tab, use options like Complementary, Analogous, Triadic to create balanced color combos.
✨ Color Tips: Chapter 2
-
Stick to 3–5 core colors to create visual consistency.
-
Warm tones (red, orange, yellow) come forward; cool tones (blue, green) recede.
-
Use neutral tones (beige, grey) to balance vibrant accents.
Lesson 2.4: Blending and Smudging
Procreate lets you blend and smudge like traditional art, creating smooth gradients and natural transitions.
✅ Step-by-Step Tutorial:
-
Open Smudge Tool
-
Choose a Soft Brush
-
Blend Gently
-
Try Different Brushes
Bonus: Blending Modes (Advanced Tip)
-
Tap the ‘N’ on the right side of a layer.
-
Choose a blend mode like:
-
Multiply: Darkens based on layer below.
-
Overlay: Boosts contrast.
-
Add: Lightens and brightens.
Use blending modes to enhance lighting, depth, and atmosphere.
✅ Chapter 2 Checklist
Download some of our single brushes, which cost less than brushsets, and practice. The Procreate default brushes are perfectly capable of giving you all the benefits and experience of digital art, too! Remember to tag us on social media – we’re excited to cheer you on!